Difference between revisions of "MTF-T035"
m (→Linux drivers) |
m (→Connections with the DevLight) |
||
| Line 44: | Line 44: | ||
|} | |} | ||
| − | == Connections with the DevLight == | + | == Connections with the DevLight v1.0== |
Just connect signals with same names together. <strong>Use the shortest wires you can !</strong> | Just connect signals with same names together. <strong>Use the shortest wires you can !</strong> | ||
| Line 50: | Line 50: | ||
[http://www.armadeus.com/products_APF9328DevLight.html] | [http://www.armadeus.com/products_APF9328DevLight.html] | ||
| − | Once done verify the connections | + | Once done, verify the connections with a multimeter. |
<strong>Do not forget to check the 3.3V supply polarity on the LCD_adapt board before to power up the system !</strong> | <strong>Do not forget to check the 3.3V supply polarity on the LCD_adapt board before to power up the system !</strong> | ||
Revision as of 11:14, 12 January 2009
Contents
TFT Specifications
The MTF-T035 320x240 3.5" color TFT display from Microtips is the default TFT display supported. Two pin compatible versions of this LCD are available: one with touchscreen (analog outputs) and one without. The MTF-T035 is provided with a 4 white led backlight.
The specification can be found here:
[1]
THIS LCD IS NO MORE AVAILABLE FROM MICROTIPS...
Some photos are although available here: Board Pictures
Important: the TFT equipped with a touch panel requires an external touch controller which is not on the LCD_Adapt. This is due to the fact that the touch panel option was not available when the LCD_adapt was designed.
Nevertheless, the touch controller will be present on the DevFull board.
Adapter Board
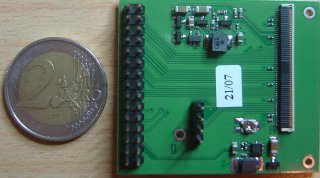
This kind of LCD requires an adapter board. The small board generates the required bias voltages, integrates a white led driver and provides a standard 2.54 connector interface. It has to be noted that only a 3.3V supply is required.
The specification can be found here: [2]
The schematics can be found here: [3]
The assembly drawings can be found here: [4]
Note that the pin 1 of the connectors are although written in the top layer copper.
Connecting the LCD to the adapter board
Connections with the DevLight v1.0
Just connect signals with same names together. Use the shortest wires you can !
The DevLight schematics and specification may be usefull: [5]
Once done, verify the connections with a multimeter. Do not forget to check the 3.3V supply polarity on the LCD_adapt board before to power up the system !
Troubleshooting
- If your LCD shows too much White then set the potentiometer on the LCD_Adapt to the minimum value.
- If LCD screen fall asleep after a given time and you want to awake it, take a look at: FrameBuffer#Tips


