How to make a VHDL design in Ubuntu/Debian
This tutorial describe how to install all tools necessary to develop simple design under ubuntu for the armadeus project. Ubuntu is a distribution based on Debian and that should work with Debian too.
Editing VHDL
To edit VHDL code all standard editing softwares like Vim, Emacs or others can be used. But Emacs has a really good vhdl-mode used by lots of designers. If you hate Emacs, you can use the xilinx-embedded editor or vim with a VHDL-plugin under development.
Making a simple project
It's a good idea to make a proper tree project for your design, because different software are used and each make a large amount of files.
Here is an exemple of VHDL project tree :
- MySimple_project/
- src/ for all sources files (.vhd,.ucf,.xcf)
- testbench/ VHDL sources files for testing your design
- ise/ Xilinx web pack will work in this directory
- simu/ All files generated by the simulator
Simulation
To stay in the free spirit, the best method to simulate is to use ghdl. GHDL is based on gcc, to install it on Ubuntu you just have to type :
sudo apt-get install ghdl
You can find a good tutorial for using ghdl here and on the official website. It's supposed that the project tree used is this one see above.
Analysing files:
ghdl -i --ieee=synopsys --warn-no-vital-generic --workdir=simu --work=work src/*.vhdl testbench/testb_file.vhd
And compile:
ghdl -m --ieee=synopsys --warn-no-vital-generic --workdir=simu --work=work testb_file
After that a binary file named testb_file is created, to launch simulation we just have to launch
it
./testb_file --stop-time=500ns --vcdgz=testb_file.vcdgz
The stop time option give the simulation time and the vcdgz option will generate a wave gunzip compressed file to visualize the result.
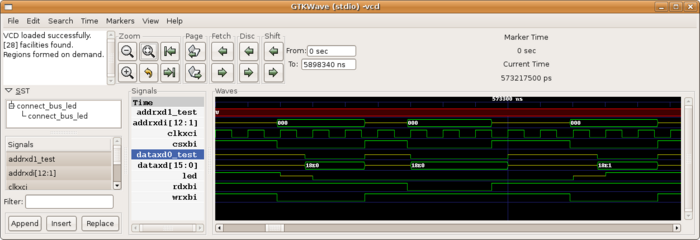
Visualizing result can be done with gtkwave:
sudo apt-get install gtkwave
We can launch it with the following command :
gunzip --stdout testb_file.vcdgz | gtkwave --vcd
It can be a good idea to made a Makefile in spite of typing all this command, here is a little Makefile:
# project name
PROJECT=bus_led_top
# vhdl files
FILES = src/bus_led.vhd src/bus_led_top.vhd
# testbench
SIMTOP = led_top_tb
SIMFILES = testbench/led_top_tb.vhd
# Simu break condition
GHDL_SIM_OPT    = --assert-level=error
#GHDL_SIM_OPT    = --stop-time=500ns

SIMDIR = simu
SYNTHFILES = bin/bus_led_ise/netgen/synthesis

GHDL_CMD        = ghdl
GHDL_FLAGS      = --ieee=synopsys --warn-no-vital-generic

VIEW_CMD        = /usr/bin/gtkwave

ghdl-compil :
 mkdir -p simu
 $(GHDL_CMD) -i $(GHDL_FLAGS) --workdir=simu --work=work $(SIMFILES) $(FILES)
 $(GHDL_CMD) -m $(GHDL_FLAGS) --workdir=simu --work=work $(SIMTOP)
 @mv $(SIMTOP) simu/$(SIMTOP)

ghdl-run :
 @$(SIMDIR)/$(SIMTOP) $(GHDL_SIM_OPT) --vcdgz=$(SIMDIR)/$(SIMTOP).vcdgz

ghdl-view:
 gunzip --stdout $(SIMDIR)/$(SIMTOP).vcdgz | $(VIEW_CMD) --vcd

ghdl-clean :
 $(GHDL_CMD) --clean --workdir=simu
to use it, just write :
make ghdl-compile
to compile and
make ghdl-run
to run the design and
make ghdl-view
to launch gtkwave and visualize results
Syntesis, place & route
To synthesize the design it is mandatory to use Xilinx tools (It's not exactly true, others tools can be used for synthesize like Mentor tools, but at the end to make the bitstream Xilinx tools are necessary), fortunately Xilinx provide his webpack for linux here (you have to register). You "just" have to download (1.7Go) and launch it, their is a good tutorial on harded.free.fr
